⏱ Prep: 20 min 🌡️Rest: 45 min 🔥Cook: 20 min 🫓Makes: 8 🌍East African
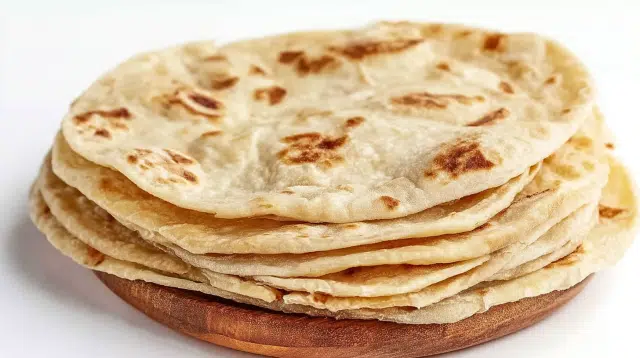
East African chapati is not the same as Indian chapati. They share a name and a broad ancestry, chapati came to East Africa through Indian traders and labourers who built the region’s railway networks in the 19th century but they became different breads. Kenyan chapati uses plain flour rather than whole wheat, oil in the dough rather than dry, a pinch of sugar, and most importantly, the coil method: each disc of dough is oiled, rolled into a rope, coiled into a spiral and rested before the final rolling.
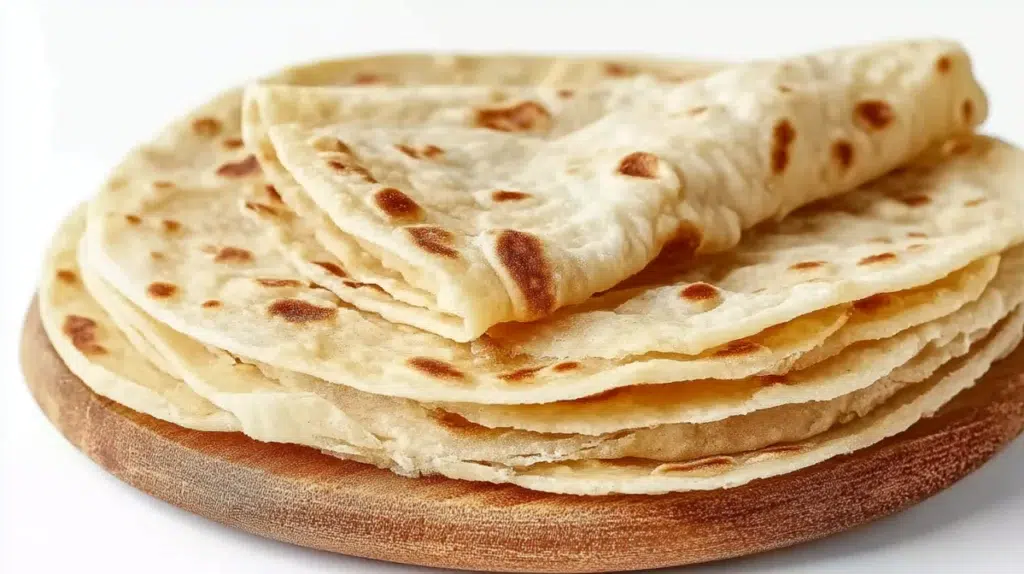
That spiral structure creates the distinct flaky, laminated layers that pull apart when you tear the bread. It is a celebratory food in Kenya made for Sundays, for special occasions, for guests and the person in any Kenyan household who makes it best is known.
The technique has two stages of rest and two stages of rolling. Neither rest can be skipped, the first relaxes the kneaded dough so it rolls without springing back, the second allows the oiled coils to settle before the final rolling. The coil method itself takes about five minutes to learn and makes the difference between a plain flat disc and a bread with proper, visible layers that separate when pulled.
Ingredients
- 400g (3⅓ cups) plain flour (all-purpose), not whole wheat. Kenyan chapati uses plain flour which gives a softer, more pliable result than the whole wheat used in Indian roti. The gluten in plain flour gives just enough stretch for the coil method without making the dough tough.
- 1 teaspoon fine salt
- 1 teaspoon sugar, a small amount that contributes subtle sweetness, helps browning and assists layer separation. Not present in Indian chapati, this is one of the markers of the East African version.
- 3 tablespoons neutral oil or melted ghee, rubbed into the flour before water is added, creating a slightly shortcrust texture that keeps the finished chapati soft and pliable. Plus extra for brushing between layers during the coil method.
- 220–240ml (about 1 cup) warm water, warm enough to dissolve the salt and sugar, around 40°C / 100°F. Add gradually, the exact amount depends on the flour. The dough should be soft and slightly tacky, not stiff.
- Extra plain flour for dusting
- 4–5 tablespoons neutral oil or ghee, for brushing between the layers during the coil method and for cooking. Ghee produces a richer, more flavourful chapati; neutral oil is more commonly used at home.
Step by step
- Make and knead the dough. Combine flour, salt and sugar in a large bowl. Add the 3 tablespoons of oil and rub into the flour with your fingertips until the mixture resembles very coarse breadcrumbs, this takes about 2 minutes. Gradually add the warm water, mixing as you go, until a soft dough forms. Turn out onto a lightly floured surface and knead firmly for 8–10 minutes until the dough is smooth, elastic and no longer sticky, it should spring back slowly when poked. Shape into a ball, rub lightly with oil, cover with a damp cloth and rest for 30 minutes. The kneading develops the gluten that gives the chapati its chew and elasticity. Under-kneaded dough tears when rolled thin and springs back constantly. After 10 minutes of proper kneading the dough should feel noticeably smoother and more cooperative. The 30-minute rest is equally important, it relaxes the gluten further so rolling is easy rather than a fight.
- Divide the dough. After resting, punch the dough down gently. Divide into 8 equal pieces, each roughly the size of a golf ball, about 80g each. Roll each piece into a smooth ball between your palms. Cover with a damp cloth while you work through them, exposed dough dries out and forms a skin that causes tearing.
- The coil method, this creates the layers. Take one dough ball. On a lightly floured surface, roll it out into a thin circle about 20–22cm across, as thin as you can get it without it tearing. Brush the entire surface generously with oil or melted ghee. Dust very lightly with flour. Now roll the circle tightly into a long, thin rope, like rolling up a yoga mat, starting from one edge and rolling all the way across. Then coil this rope into a tight spiral (like a snail shell), tucking the loose end underneath the coil. Press down gently to flatten slightly. Set aside and repeat with the remaining dough balls. Cover all coils with a damp cloth and rest for 15 minutes. The oil between the layers is what creates the lamination. When the coil is rolled out again and cooked, the oil-separated layers puff slightly and separate, producing the characteristic flaky, pull-apart texture. Be generous with the oil at this stage, too little and the layers fuse together during cooking.
- Roll the coils into chapatis. After the second rest, take one coil and flatten it gently with your palm. Roll it out into a circle about 18–20cm across, slightly thicker than the initial roll (about 3–4mm). The swirling layers will be visible in the dough. Don’t roll so thin that the layers compress back together. Keep the rolled chapatis covered while you roll the remaining coils.
- Cook the chapatis. Heat a heavy non-stick pan or cast iron skillet over medium-high heat for 2 minutes until hot. Place one chapati in the dry pan, no oil yet. Cook for 60–90 seconds until the surface starts to look dry and large bubbles begin to form underneath. Brush the top surface with a little oil. Flip. Brush the now-top surface with oil. Cook for 60–90 seconds until golden spots appear on the bottom. Flip once more and press gently with a spatula around the edges to encourage even cooking. The chapati should be lightly golden on both sides with darker spots and slightly puffed. The sequence of oiling matters, no oil in the pan initially, then oil brushed onto the chapati itself during cooking. This method produces a chapati that is lightly crisped on the outside from the oil on its surface while the interior stays soft. Oil in the pan from the start creates a frying effect rather than the characteristic dry-cooked-then-oiled texture.
- Wrap immediately. Transfer the cooked chapati to a clean kitchen towel and wrap it to keep warm and soft. Stack subsequent chapatis inside the same towel. The steam trapped inside the towel keeps them pliable, chapatis left uncovered cool and harden within minutes. Serve warm.
Claire’s note
Two things that separate a good chapati from a great one. First: be generous with the oil during the coil stage. The layers only separate during cooking if there is enough oil between them to prevent fusing. A thin scrape of oil produces flat, unlayered bread. A proper brush coat, the whole surface glistening, produces the distinct flaky layers that pull apart when you tear the chapati. Second: wrap each chapati in a towel the moment it comes off the pan.
East African chapati goes from soft and pliable to stiff and leathery in about five minutes uncovered. The towel traps steam and keeps them soft for up to 30 minutes. In Kenyan households these are often made in large batches with one person rolling and one person cooking, the assembly line means they go straight from the pan into the towel pile and stay warm through the whole meal.
Serve with
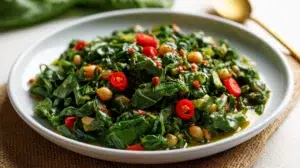
In Kenya and across East Africa, chapati is served with kuku paka (East African coconut chicken), Kenyan pilau, lentil stew, beef stew, sukuma wiki (braised collard greens) or any rich curry. It is also eaten at breakfast with a cup of spiced tea, chai and is part of the Ugandan street food “Rolex” (chapati rolled around a vegetable omelette). The full African food collection has everything it pairs with.
Add East African chapati to your weekly meal planner as a weekend bread project, the dough takes 10 minutes to make, the resting is hands-off, and a batch of 8 feeds a table. Leftovers reheat perfectly in a dry pan for 60 seconds per side.
And for more recipes, follow us on Pinterest.
Print
East African Chapati
- Total Time: 45 minutes
- Yield: 8 servings 1x
- Diet: Vegetarian
Description
Learn how to make traditional East African chapati, a flaky and layered bread perfect for special occasions and meals.
Ingredients
- 400g (3⅓ cups) plain flour (all-purpose)
- 1 teaspoon fine salt
- 1 teaspoon sugar
- 3 tablespoons neutral oil or melted ghee
- 220–240ml (about 1 cup) warm water
- Extra plain flour for dusting
- 4–5 tablespoons neutral oil or ghee, for brushing
Instructions
- Make the dough: Combine flour, salt, and sugar in a large bowl. Add the oil and rub into the flour until the mixture resembles coarse breadcrumbs. Gradually add warm water until a soft dough forms. Knead for 8–10 minutes, then rest covered for 30 minutes.
- Divide the dough: Punch the dough down and divide into 8 equal pieces. Roll each piece into a smooth ball.
- The coil method: Roll each dough ball into a thin circle. Brush with oil, dust lightly with flour, then roll into a thin rope and coil it into a spiral. Repeat and rest for another 15 minutes.
- Roll the coils into chapatis: Flatten the coil and roll out into a circle about 18–20cm across.
- Cook the chapatis: Heat a non-stick pan over medium-high. Cook each chapati for 60–90 seconds per side, brushing with oil, until golden and puffed.
- Wrap immediately: Transfer cooked chapatis to a kitchen towel to keep warm.
Notes
Be generous with oil between layers for flaky texture. Wrap chapatis in a towel right after cooking to keep them soft.
- Prep Time: 20 minutes
- Cook Time: 20 minutes
- Category: Bread
- Method: Baking
- Cuisine: East African
Nutrition
- Serving Size: 1 chapati
- Calories: 200
- Sugar: 1g
- Sodium: 400mg
- Fat: 10g
- Saturated Fat: 2g
- Unsaturated Fat: 6g
- Trans Fat: 0g
- Carbohydrates: 30g
- Fiber: 2g
- Protein: 4g
- Cholesterol: 0mg